
In this article, a certificate for a digital signature is created to digitally sign files with Windows PowerShell. A digital certificate is usually issued by a Certification Authority (CA). But in this post, we are going to create a self-signed certificate. Of course with PowerShell. No need for 3rd party tools.
Introduction
A file is signed with a certificate. Cryptography can be used to verify authenticity. This is done using the key pair private key and public key. The file is digitally signed with the private key and the public key is used to verify its identity. The public key can be given to anyone. The private key is only yours. which means your identity can be verified.

In this article a self-signed certificate is created, which means that – for the moment – you and your computer are the only ones on this planet that trust the certificate. 😉
Creating a self-signed Certificate
Open Windows PowerShell and run the following One-Liner to create a signing certificate.
New-SelfSignedCertificate -DnsName patrick@sid-500.com -CertStoreLocation Cert:\CurrentUser\My\ -Type Codesigning

You can find your certificate in your certificate store. Run certmgr.msc.
certmgr.msc

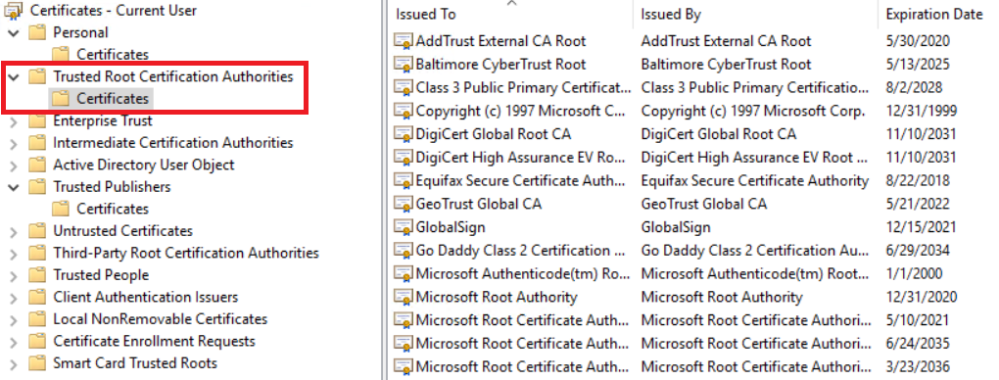
Import the Certifcate in Trusted Root Certification Autorities and Trusted Publisher
Now the certificate must be exported and then imported into the Trusted Root Certification Authorities and Trusted Publishers.

Double click on the certificate and select Details and Copy to file …

Do not export the private key. No need for.

Select CER Format.

Save the file wherever you want.
Now import the certificate to the Trusted Root Authorities and Trusted Publishers.

Sign a file
Next, we use Set-Authenticodesignature to sign our file. In this example, it is a. ps1 file, thus a PowerShell script.
Set-AuthenticodeSignature -FilePath C:\Temp\script1.ps1 -Certificate (Get-ChildItem -Path Cert:\CurrentUser\My\ -CodeSigningCert)

Don’t worry about the Status Unknown Error. The next time you do it valid comes up. Crazy Stuff. Ok, we don’t care about this now.

Nice. Finally, see what happened. Open Windows Explorer, right click on your file, select properties and click on Digital Signatures.

Testing your script
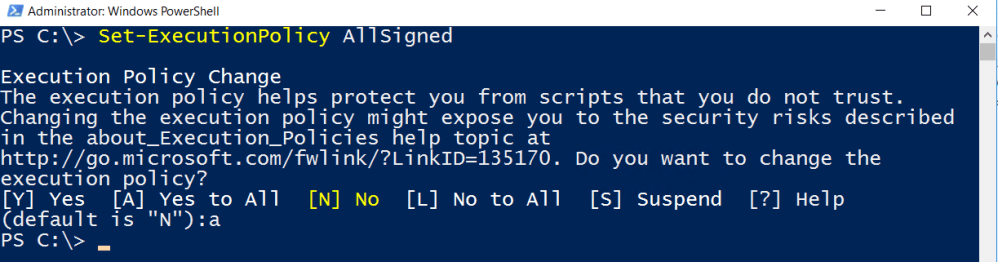
For testing your script, make sure the execution policy allows the running of PS1 scripts.
Get-ExecutionPolicy
Remotesigned, AllSigned and Unrestricted are your friends … If the policy is set to restricted then set it – for this testing environment – to AllSigned.
Set-ExecutionPolicy AllSigned
More about Execution Polices here:
https://technet.microsoft.com/de-at/library/hh847748.aspx
Then run your script.

Error handling
Issue No.1
If you see something like this, then you might have forget to import your certificate to the Trusted Root Certificate Authorities.
C:\temp\Script1.ps1 : File C:\temp\Script1.ps1 cannot be loaded. A certificate
chain processed, but terminated in a root certificate which is not trusted by
the trust provider.
Issue No.2
If you must confirm the execution of your script, then it looks like this:
Do you want to run software from this untrusted publisher?
File C:\temp\Script1.ps1 is published by CN=patrick@sid-500.com and is not
trusted on your system. Only run scripts from trusted publishers.
[V] Never run [D] Do not run [R] Run once [A] Always run [?] Help
(default is “D”):
To avoid this, import your certificate to the Trusted Publishers.

Have fun playing with Certificates and Digital Signatures!
Categories: Cyber Security, PowerShell, Windows Server


Old thread, I know, but I found that since I have more than one cert in my personal store, I needed to specify which one I wanted to use to sign my script.
When running the Set-AuthenticodeSignature command, I encountered the error “Cannot convert ‘System.Object[]’ to the type ‘System.Security.Cryptography.blahblahblah….”.
I added an index to the cert name (using [0], since it was the first one listed) and re-ran the Set-Authenticode command. All is well after that.
$Cert = Get-ChildItem -Path Cert:\CurrentUser\My\ -CodeSigningCert
Set-AuthenticodeSignature -FilePath “MyScriptThatNeedsSigning.ps1” -Certificate $Cert[0]
Thanks for the leg up!
LikeLiked by 1 person
You can also attach the thumbprint to this instead of an index
Set-AuthenticodeSignature -FilePath C:\Temp\script1.ps1 -Certificate (Get-ChildItem -Path Cert:\CurrentUser\My\XXXThumbprintOfYourCertXXX -CodeSigningCert)
LikeLiked by 1 person
Nice article. I wrote a function to manage signing one/multiple scripts using a code signing cert, with graceful handling if more than one valid code signing cert exists. https://www.ucunleashed.com/1496
LikeLike
Hi sniper!
Thank you for the hint!
Regards,
P
LikeLiked by 1 person
Will the solution work with power shell scripts running with on-prem service account and O365 tenant service account?
LikeLike