
One of the first things you learn in cisco lessons is how to create login banners. A banner is a message shown to a user who is using the device. In this article I am going to configure login banners for Windows Server and Client Systems by using Windows PowerShell.
Introduction
Login Banners can be configured in two ways: Graphical Interface and Command-Line. In graphical user interface the configuration can be found in gpedit.msc, Computer Configuration – Windows Settings – Security Options.
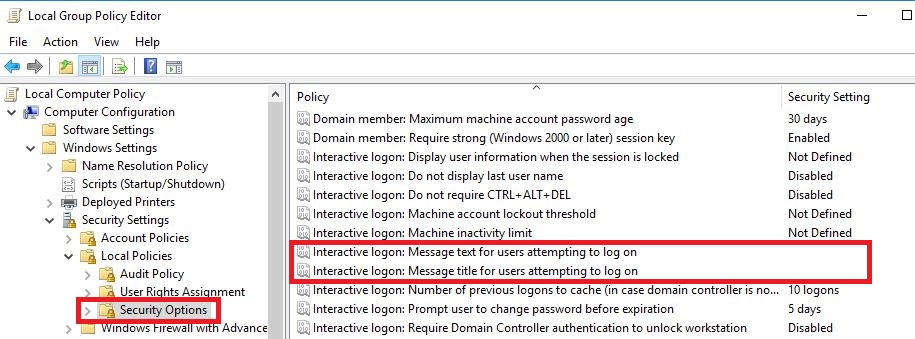
If you want to configure login banners with group policies, open gpmc.msc and configure these two settings. Then link the GPO to an OU/Site/Domain. In this article we configure Login Banners without GPOs.
Configuring Interactive Login Messages with PowerShell (localhost)
We have to configure the message title and the message text. If we leave one of them unconfigured, Login Messages will not be displayed.
Run the following One-Liner to set the title of the message (Welcome!)
Set-ItemProperty -Path "HKLM:\SOFTWARE\Microsoft\Windows\CurrentVersion\Policies\System" -Name "legalnoticecaption" -Value "Welcome!"

Next, configure the message text. (*** Authorized Access Only ***)
Set-ItemProperty -Path "HKLM:\SOFTWARE\Microsoft\Windows\CurrentVersion\Policies\System" -Name "legalnoticetext" -Value "*** Authorized Access Only ***"

Log off and log on. And here it is:

Configuring Interactive Login Messages with PowerShell (Remote Computers)
To configure logon banners on all server systems, we must first retreive a list of the server computer names. To catch and save all computer names (Active Directory) in a file run
(Get-ADComputer -Filter 'operatingsystem -like "*server*"').Name | Out-File C:\Temp\Servers.txt

Next, modify the registry settings for welcome messages of each server by executing
Get-Content C:\Temp\Servers.txt | ForEach-Object {Invoke-Command -ComputerName $_ {Set-ItemProperty -Path "HKLM:\SOFTWARE\Microsoft\Windows\CurrentVersion\Policies\System" -Name "legalnoticecaption" -Value "Welcome!"; Set-ItemProperty -Path "HKLM:\SOFTWARE\Microsoft\Windows\CurrentVersion\Policies\System" -Name "legalnoticetext" -Value "*** Authorized Access Only ***"}}

Another option is using Group Policies.
See also
More about bulk operations see my articles
PowerShell: Enable Remote Desktop on multiple Servers remotely (Bulk)
PowerShell: Changing Active Directory user logon names (Bulk)
Categories: Cyber Security, Windows 10, Windows Server


How add to breakup two lines in massage in interactive logon massage
LikeLike
Das wäre eigentlich eine schöne Aufgabe für Try und Catch um das Kommando nur auf den Rechnern auszuführen, die auch erreichbar sind 😀
LikeLiked by 1 person
Hallo Roland, Danke für den Tipp: Ja, das wäre durchaus auch auf diesen Weg eine gute Idee. Ich dache eigentlich an Windows Server, welche immer erreichbar sind und an eine saubere Datenbank 😉
LikeLike