
When it comes to certificates, many people flee. The topic is not very popular, but everything is not as bad as feared. In this article I will show you how to store your password or passwords in encrypted form on your hard drive. Due to the public/private key process, the user holding the certificate (specifically the privat key) is the only one who can open the file and read the passwords. Afterwards I am going to show how to use this password for some remote actions.
What is this article for?
Every time you do remoting you will be asked for your credentials. If that bothers you, read on. We are going to save your password protected by cryptography on our hard disk. Our goal is a new advanced function called Enter-PSSessionPW that uses your encrypted password to establish a remote connection.
Security Note
The shown solution is not 100% secure. But it’s possible to make it more secure. For more information see the last part of this article.
But first, we have to take a look at the general process.
Asymmetric Cryptography
Let me first give you an overview of Asymmetric Cryptography, to fully understand what we are going to do in this article. Consider the process of Protect-CmsMessage:

That means that we can only use the private key to decrypt data. With the public key we can encrypt data.
This process can be checked by giving the public key to the user Petra. She then uses the public key to encrypt the contents of a file. However, she cannot decrypt the file because she is missing the private key (only pewa2303 has it). To show this I have exported the public key and Petra has installed it in her certificate store (Personal – Certificated). Now the following happens:
Petra is able to encrypt content with the public key of pewa2303’s certificate. As expected.

As hoped Petra is unable to decrypt the content, because she is missing the private key.

But on the other hand pewa2303 is able to decrypt the message, because he is the holder of the private key. Don’t be confused pewa2303 = administrator 😉

quod erat demonstrandum 😉
Let’s get to work!
Creating a new Certificate for Document Encryption
In order to do the shown above, we first need a certificate. There are exactly two ways to do this: 1. you have one from a public certification authority, or if not, you buy one, and 2. you create one for yourself. Since I assume that most readers don’t have a certificate, we are now working together to create one.
Ok let’s go for it. All you have to do is to copy the command below in your PowerShell session. The name pewa2303 should be customized. In 2018 we don’t need 3rd party tools like makecert anymore. Thank god or the PowerShell Team for this!
New-SelfSignedCertificate -DnsName pewa2303 -CertStoreLocation "Cert:\CurrentUser\My" -KeyUsage KeyEncipherment,DataEncipherment,KeyAgreement -Type DocumentEncryptionCert

Note the thumbprint above. For the following we need this number and a password for the pfx file that includes the private key.
Check it with
certmgr.msc

I strongly recommend to back up this certificate NOW. Not later. Later means never. 😉
Export-PfxCertificate -Cert Cert:\CurrentUser\My\9209C2F587CC95B6F229279ACDB8B3765C1D054B -FilePath C:\Temp\cert.pfx -Password (ConvertTo-SecureString -AsPlainText '123' -Force)

Now we have a backup of the certificate. Best you choose a better password than me and store the file on a medium other than the hard disk 😉

Now we are able to move on with some cryptographic action.
Encrypting your password
In summary: We have a certificate. We’ve backed up this certificate. Now we can use this cert to encrypt a file. First, we create a new file.
New-Item -ItemType File -Path C:\Temp\pwd.txt

Next we place our encrypted password into this file. Here we have to provide the name of the certificate (cn=pewa2303) which you have defined in the first step.
'password' | Protect-CmsMessage -To cn=pewa2303 -OutFile C:\Temp\pwd.txt

A quick check shows what happened:

Nice, we have an encrypted file with our password in it. And you are the only one on this planet who can decrypt it (remember the private key!):
Unprotect-CmsMessage -Path C:\Temp\pwd.txt

Using that method to connect to Remote Hosts
The Enter-PSSession cmdlet offers a credential parameter. Our first step is to store the password in a variable.
$password = ConvertTo-SecureString (Unprotect-CmsMessage -Path C:\Temp\pwd.txt) -AsPlainText -Force

Then we create a new PSCredential Object. Fill in your username.
$cred= New-Object System.Management.Automation.PSCredential ('sid-500\administrator', $password )

From now on we can use this credential $cred variable to connect to remote hosts.
Enter-PSSession -ComputerName dc01 -Credential $cred

But this approach is a cumbersome and boring one. So, let’s automate that.
A new function: Enter-PSSessionPW
Open PowerShell ISE. Copy the following code.
function Enter-PSSessionPW {

[CmdletBinding()]

param (

[Parameter(Position=0)]
$ComputerName='localhost'

)

$password = ConvertTo-SecureString (Unprotect-CmsMessage -Path C:\Temp\pwd.txt) -AsPlainText -Force
$cred= New-Object System.Management.Automation.PSCredential ("sid-500\administrator", $password)

Enter-PSSession -ComputerName $ComputerName -Credential $cred

}
Press the green button. The command is now available and uses your password in the encrypted file. The default value for the computername parameter is localhost.

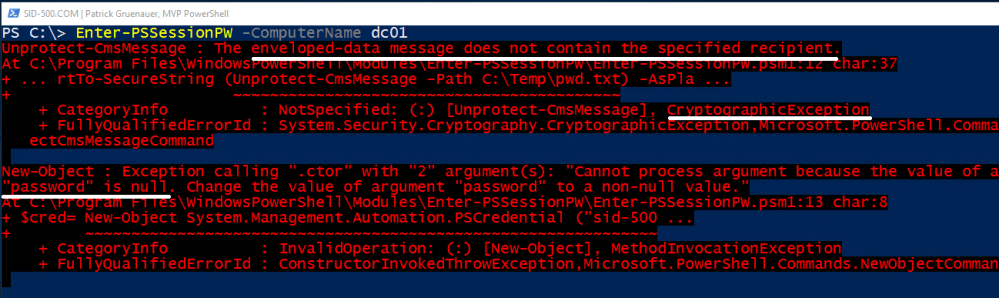
Let’s assume another user logs on the computer. This user cannot decrypt the file, because the user does not have the private key . Therefore the command won’t work.
Make it permanent
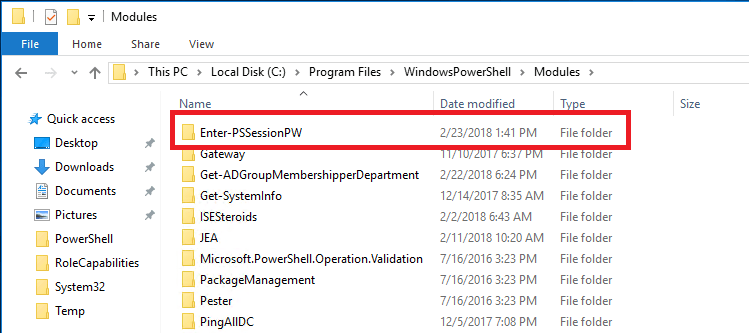
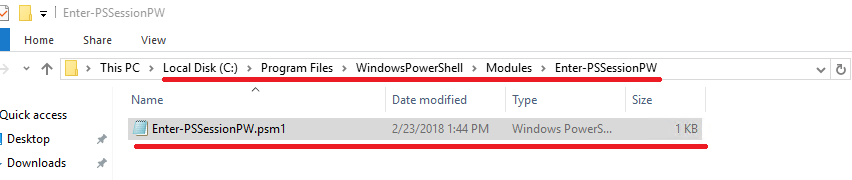
If you like my approach open PowerShell ISE. Copy the function into your ISE session. Create a folder in C:\Program Files\Windows PowerShell\Modules and save the code as psm1 file. Make sure that your file name and folder name match.
From now on, PowerShell will load the custom module each time PowerShell is started.
Security Concerns
It is always better not to write down your password anywhere. In the scenario shown above, the password is stored in encrypted form. Remember that anyone who gets to your certificate can decrypt your password. Be aware that the certificate is stored in a separate memory, but that anyone who can access your unlocked PC will also be able to access the certificate. Consider the following scenarios.
Vulnerabilities
- The administrator could change the user’s password and log in with the user’s credentials. Then the administrator has access to the certificate and it’s private key
- Someone could start the computer with a boot disk, such as Hiren’s Boot. Then he is able to reset the password of the user’s account, he can log in as this user and steal the certificate
Countermeasures
- Install BitLocker Drive Encryption to make sure that no one can start your computer with a boot disk
- Make sure you’re the only administrator of the computer
- The certificate should be configured so that the private key cannot be exported and the certificate should be coming from an official certificate authority
See also
For remoting see also my other articles:
PowerShell: Implementing Just-Enough-Administration (JEA), Step-by-Step
Categories: PowerShell, Windows Server


5 replies »