
In this article, I will focus on Microsoft Defender. I will give you a few examples that you can build on. It’s not about doing wonderful things, it’s about basics. Let’s jump in.
Microsoft Windows Defender Module
Before we begin, we need information about the Defender module and its cmdlets.
Get-Command -Module Defender
We get a list of all Defender cmdlets.
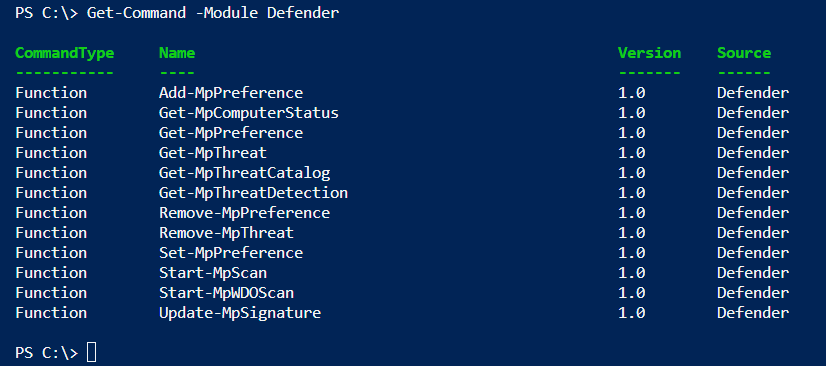
Let’s take some out and play with them.
Retrieving Defender Information
Run the cmdlet below to retrieve an overview of your defender configuration.
Get-MpComputerStatus
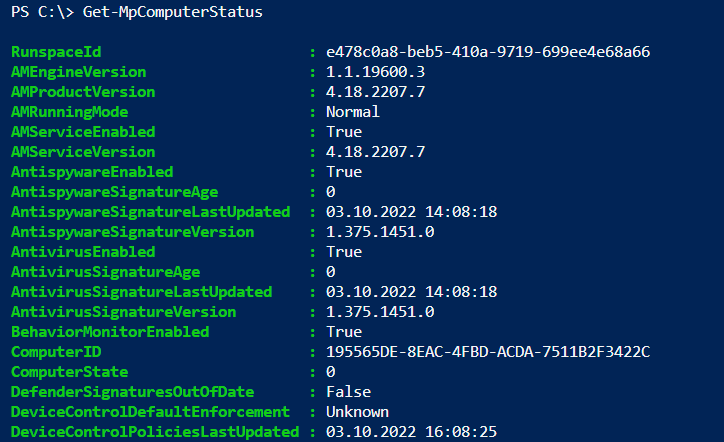
A lot of information runs across the screen.
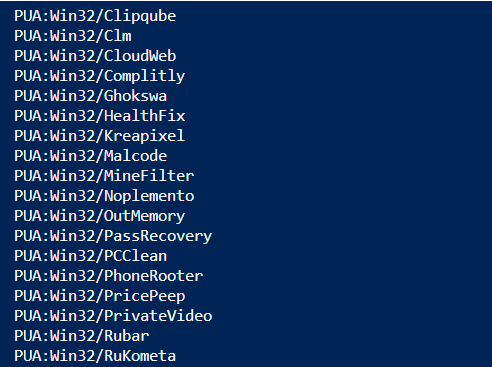
Get-MpThreatCatalog is a very useful cmdlet that displays information about malware signatures the computer is protected against. The second command is more precise and shows only the treat name instead of all information. The third command saves all threat names to a file.
Get-MpThreatCatalog
Get-MpThreatCatalog | Select-Object ThreatName
Get-MpThreatCatalog | Select-Object ThreatName | Out-File $home\threats.txt
For example, if you want to show only Trjoans, run this command.
Get-MpThreatCatalog | Where-Object ThreatName -like "*Trojan*" | Select-Object ThreatName
Configure Microsoft Defender
What is most important in Defender? Yes, update the signatures.
Update-MpSignature -Verbose
To start a scan, run the Start-MpScan cmdlet.
Start-MpScan -Verbose
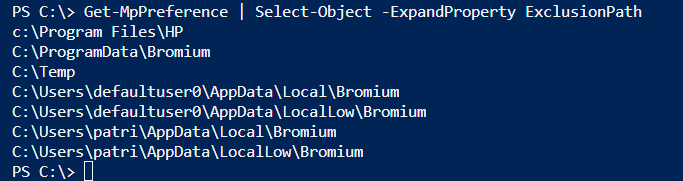
Finally, you can add an exclusion. This exlusion path is not scanned or monitored by Microsoft Windows Defender.
Add-MpPreference -ExclusionPath "C:\Temp"
To get an overview of the configured exclusion paths, run Get-MpComputerStatus and select the ExclusionPath property.
Get-MpPreference | Select-Object ExclusionPath

But it is nicer that way:
Get-MpPreference | Select-Object -ExpandProperty ExclusionPath
That’s what I wanted to show in this post.
Categories: Cyber Security, PowerShell, Windows 10, Windows 11, Windows Server


Cheers.
LikeLike
Is there any power shell script to disable bookings licence for 1000 users
LikeLike