
This step-by-step guide demonstrates the integration of LAPS in an Active Directory environment. Active Directory user passwords are stored centrally on all Domain Controllers. What about the local account of the administrator? Many of us use the same password on all computers. A nightmare in terms of security. LAPS can store and change local administrator passwords centrally.
Downloading the LAPS Installer
LAPS should be installed on a management server (in my case, a Windows Server 2016 domain controller). First, we have to download the LAPS Installer: https://www.microsoft.com/en-us/download/details.aspx?id=46899
Installing LAPS on the Management-Server
During setup it’s important to select all features, otherwise only the client-side extensions (which are also required for the clients) will be installed.

Modifying the Active Directory Schema
Two attributes must be added to the computer objects:
- msMcsAdmPwd
- msMcsAdmPwdExpirationTime
Both attributes can be created by using LAPS commands in PowerShell. The user must be a member of the Active Directory Schema Admins group. Open Windows PowerShell and run
Import-Module AdmPwd.PS
Update-AdmPwdADSchema

Configuring Permissions
Domain computers must have write permissions to renew the password of the local administrator. In my case, I grant access for all computers of the organizational unit “Workstations”.
Set-AdmPwdComputerSelfPermission -Identity Workstations

Now we have to configure group permissions. All group members of this group will be able to read the local password of each computer centrally. I grant “read password permission” for the domain admins group.
Set-AdmPwdReadPasswordPermission -OrgUnit Workstations -AllowedPrincipals "Domain-Admins"
Next we configure the right to reset the password of the local administrator account. As before, I allow it for all Domain Admins.
Set-AdmPwdResetPasswordPermission -OrgUnit Workstations -AllowedPrincipals "Domain-Admins"
Installing LAPS on the Client Computers manually
In order to use LAPS, the AdmPwd GPO Extensions must be installed on all client computers. This can be done either manually or via GPO. In my case, I manually install the previously used tool on a Windows 10 system. All you need to do is to install only the client-side extensions.

Installing LAPS on the Client Computers by using Group Policy Software Installation (Bulk)
Well, it’s boring to install LAPS on hundred or thousand computers manually. In a production environment you can install the software by using group policy. This now takes some time. Are you ready? 😉
Create a shared folder
First, we have to create a shared folder and put the installation files in it. All we need is PowerShell and the installation package. For creating a shared folder on the management server open Windows PowerShell and run
New-Item -Itemtype Directory -Name LAPS -Path C:\

Once the folder is created, activate sharing.
New-SmbShare -Name LAPS -Path C:\LAPS\

Now copy the installation package into the folder.

Configure a GPO for Software Installation
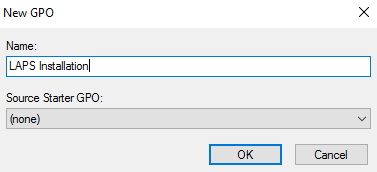
On a domain controller, open the group management console (gpmc.msc). Create a new GPO by following my screenshots.

Provide a name for the GPO.
Click on Edit.

Navigate to Computer Configuration – Policies – Software Settings. Right click Software Installation and select New – Package.

Pay attention to the path. You have to provide the UNC Path of the previously configured shared folder. Do not start browsing your computer to find the package! Enter the path to the folder manually by using the format \\ServerName\SharedFolderName\LAPS.x64.msi and click Open.

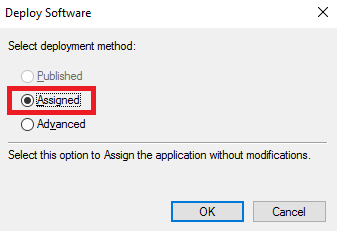
Next, select Assigned.
Review your work.

Finally, link the GPO to an organizational unit. Make sure, that you link it to the OU of your client computers.

For testing, run gpupdate /force on one of your client computers. Then restart the computer. After restarting check Programs and Features.

Let’s move on configuring the final steps.
Enabling LAPS on all Client Computers
The last step is to create a GPO for LAPS. On a domain controller, open the group policy management console (gpmc.msc) and create a new GPO named LAPS. Open the GPO and navigate to Computer Configuration – Policies – Administrative Templates – LAPS. Enable “Enable local admin password mangement“.
Important note: You might want to change setting “Name of administrator account to manage” if the name of your local administrator account on your client-computer is not “administrator”, but f.e. “admin“.

Then link the GPO to the Organizational Unit.

Run gpupdate /force on all Client Computers. You can do this remotely: PowerShell: Force gpupdate on all Domain Computers
Showing Local Administrator Passwords
On the management server open LAPS.

Enter the computer name of one of your clients.

As an alternative, open Windows PowerShell and run
Import-Module AdmPwd.PS
Get-AdmPwdPassword -ComputerName ComputerName | Format-List

Advanced Settings
Changing Password Policies
With LAPS you can enforce local administrator password policies. Open the previously created GPO and configure the appropriate settings.

Have fun with LAPS!
More Informations about LAPS here: Technet: “Local Administrator Password Solution”.
Categories: Cyber Security, Windows Server


Hi and thank you for a well written article!
As the solution is implemented on a domain controller, it also changes the password for the local administrator on the domain controller itself, which we want to avoid.
Can you advise if there is a way to avoid LAPS changing the local admin password for the very computer it is running on?
Regards,
Per
LikeLike
There are no local admin accounts on Domain Controllers.
LikeLiked by 1 person
There are no Local Administrator accounts on Domain Controllers.
LikeLiked by 1 person
Should this command be executed on the domain controller?
Modifying the Active Directory Schema
Import-Module AdmPwd.PS
Update-AdmPwdADSchema
Set-AdmPwdComputerSelfPermission -Identity Workstations
Set-AdmPwdReadPasswordPermission -OrgUnit Workstations -AllowedPrincipals “Domain-Admins”
Set-AdmPwdResetPasswordPermission -OrgUnit Workstations -AllowedPrincipals “Domain-Admins”
LikeLike
Yes, of course
LikeLike
Hello Patrick!
Recently I had deploy LAPS in our AD infrastructure, everything looks good:
– I’m able to see and reset passwords,
BUT when I try to use on machine this password it doesn’t accept by PC.
Any ideas what I need double check?
Thank you!
LikeLike
Hi!
Does gpresult /r, executed on your client computer shows your LAPS policy?
Best,
P
LikeLike