
A standardized and tidy desktop is a key factor for satisfied users. In order to provide the ease of use of Windows systems in an enterprise environment it’s reasonable that the taskbar is designed to contain exactly what users actually need and use for their daily work. In this post I am going to carry out customizing the Taskbar and customizing the Start Menu with Group Policies. I will stick to an example scenario the reader can build on. Let’s jump in.
The Objective
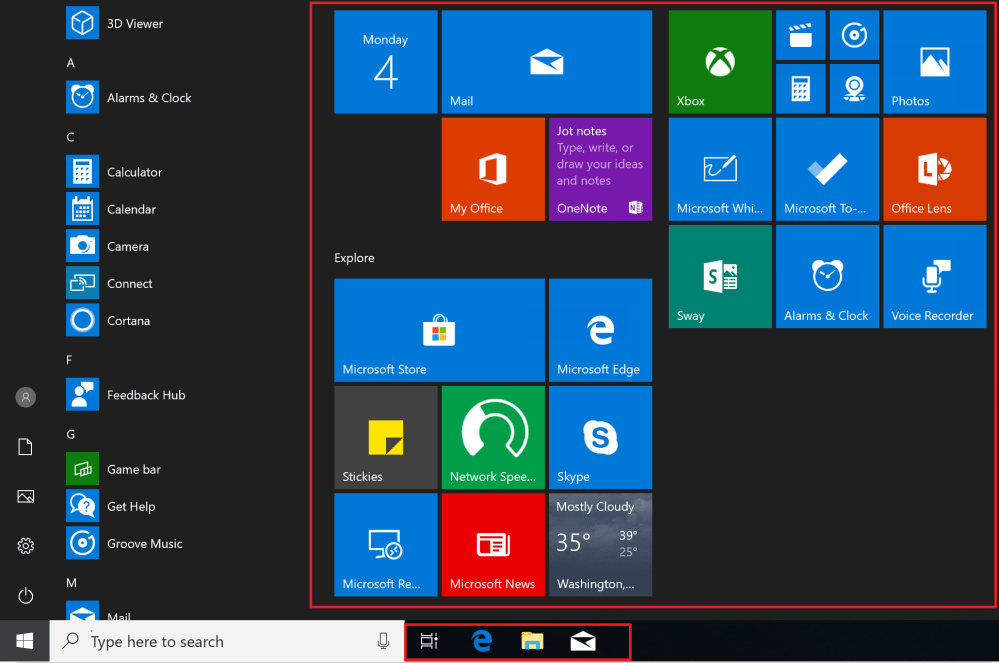
The goal is a standardized desktop with the taskbar desktop applications order shown below. The start menu should also be adapted as shown.
Create the File Share
With the launch of Windows 10, the procedure of modifying the taskbar with Group Polices has slightly changed. What you now need is an XML file and a file share.
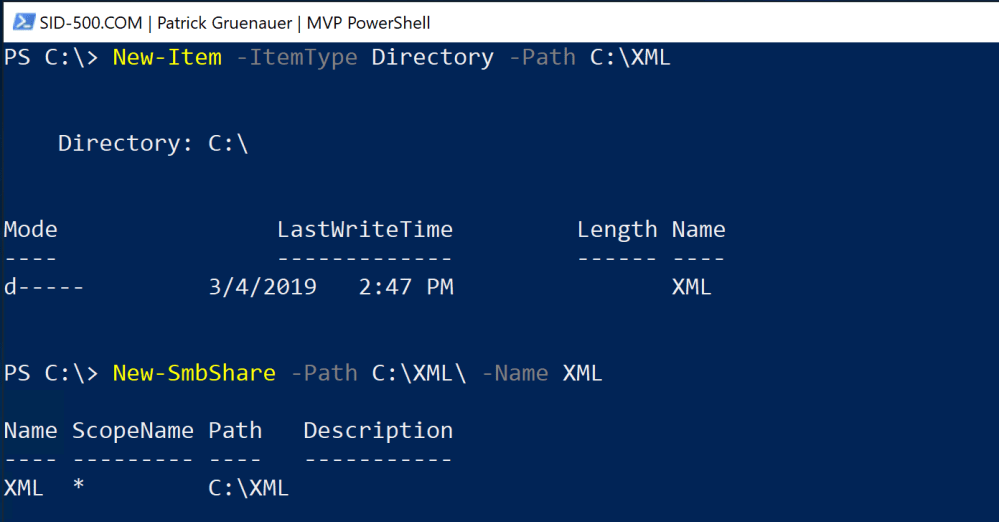
First, I create a folder and a file share on a Windows Member-Server of my domain. The default Everyone: Read file share permissions are fine and do not need to be changed. Open PowerShell and hit the keys.
The first command creates the XML directory. The second command creates a file share named XML.
New-Item -ItemType Directory -Path C:\XML

New-SmbShare -Path C:\XML\ -Name XML
Now we have a folder and a file share. Let’s put in a file.
Modify a sample XML File
For the following I will use a sample XML file from Microsoft Docs that can be found here: https://docs.microsoft.com/en-us/windows/configuration/configure-windows-10-taskbar
Starting from this file, I will customize the Start Menu and the Taskbar. The taskbar should be arranged in the following order:
- Edge Browser
- Windows Explorer
- Microsoft Outlook 2019 (x86)
- Microsoft Word 2019 (x86)
- Microsoft Excel 2019 (x86)
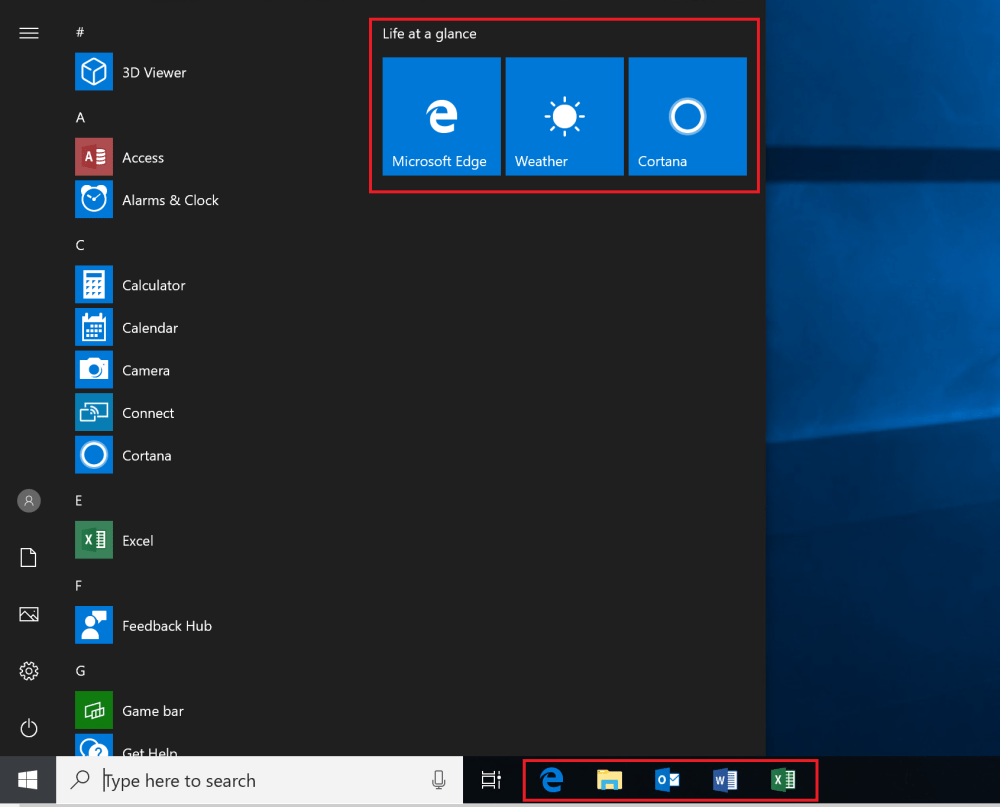
Also, the start menu should show only Edge, Cortana and Bing Weather. I’m talking about changing these default settings:
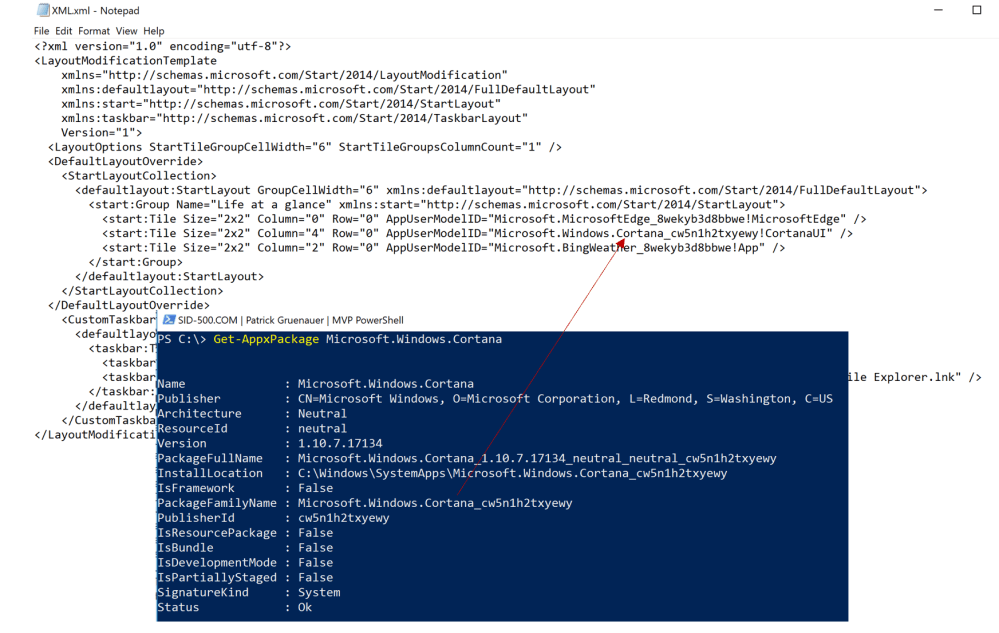
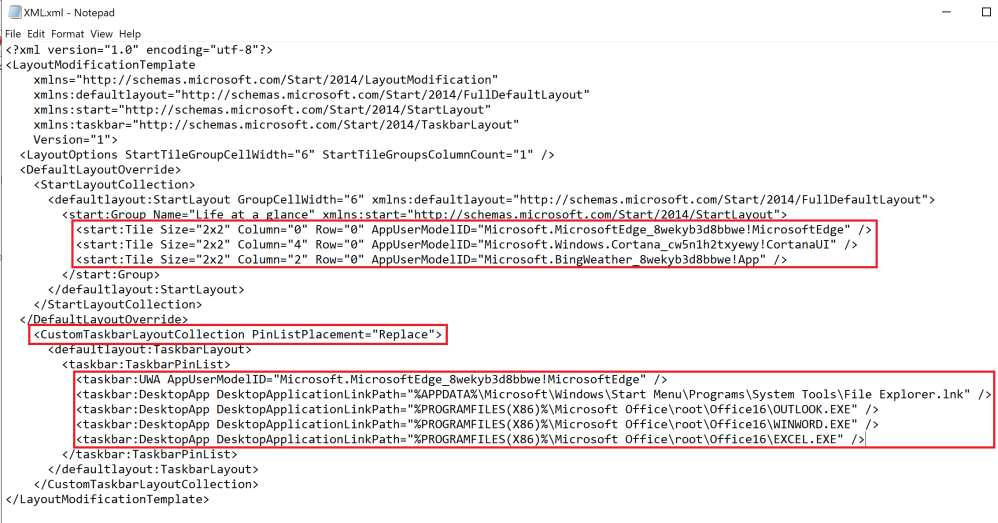
Next, I put the sample file in my preconfigured folder from the previous part. For my project, wo sections are particularly interesting. The StartLayoutCollection and CustomTaskbarLayoutCollection.

Side Note: How to get those unusual file names or better called AppUserModelID? Use Get-AppxPackage to investigate the correct names. The example below retrieves the Cortana PackageFamilyName.
Get-AppxPackage Microsoft.Windows.Cortana
In order to successfully finish my project, I have to change the taskbar settings. As it turns out, the Start Layout settings can be configured in the first part, for me it’s fine to have only Edge, Cortana and Bing Weather in it. So I can move on modifying the taskbar.
Here is my final XML file pointing to the Office 2019 (x86) applications.
Which brings me to the last part of this blog post that creates the Group Policy and links a GPO to my user accounts.
Creating the GPO
Finally, we need to assign the XML file to our users. One of the best practices to do that is using Group Policies.
On a domain-controller of your domain open gpmc.msc. Create a new GPO and navigate to
User Configuration – Policies – Administrative Templates – Start Menu and Taskbar – Start Layout
Double-click Start Layout, select the Enabled radio button and enter the UNC path to your XML file. In my case \\dc01\xml\xml.xml. Take care of typos.

Now link your GPO to an OU of your choosing. Note that you’ve configured a GPO for user, therefore your GPO must contain user accounts, not computer accounts.
Have fun with your standardized desktops!
See also
Windows 10: Deny Windows Store Access and Disable all Apps from Microsoft Store with Group Policies
Categories: Windows Server


What version of Windows 10 was used?
LikeLike