
Windows Remote Management is a powerful feature to administer your Windows systems remotely. WinRM is enabled by default on all Windows Server operating systems (since Windows Server 2012 and above), but disabled on all client operating systems like Windows 10, Windows 8 and Windows 7. In this blog post I will show you how to enable WinRM on your client computers by using Group Policies.
Introduction
If you want to perform some magic stuff like restarting all client computers, enabling Remote Desktop remotely, query logged on users or simply connecting to your client computers with PowerShell then you have to enable WinRM on your clients.
At this point I would like to mention that my Active Directory Services Tool only works flawlessly with WinRM enabled clients. More about this tool here: Active Directory Domain Services Section (Version 1.1)
Unlike Windows Server operating systems, Windows client operating systems are missing the following settings:
- No WinRM listener configured
- No Firewall exception configured

- The WinRM service is disabled

Let’s change this. We have to configure three settings for our client computers.
Creating the GPO
On a domain controller of your domain open gpmc.msc and create a new GPO (Group Policy Object).

Enter a name for your new GPO and hit OK.

Configuring the Settings for WinRM
Next, right-click on your newly created GPO and select Edit.

Creating the Firewall Exception
Navigate to
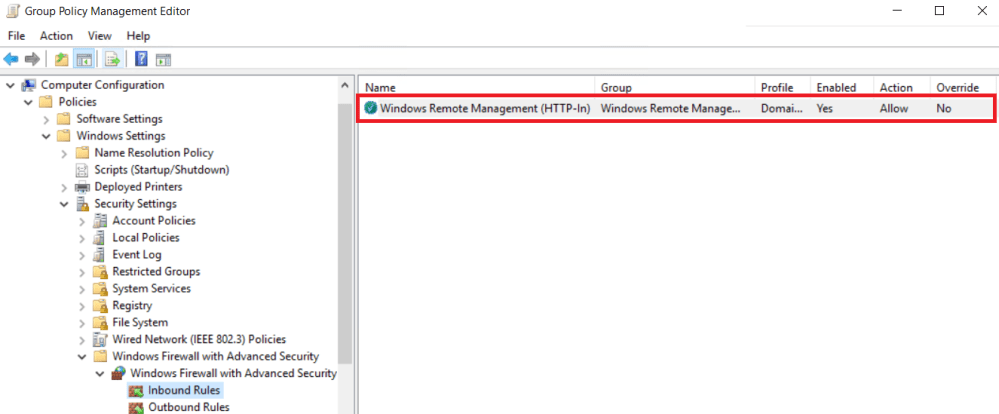
Computer Configuration – Windows Settings – Security Settings – Windows Firewall with Advanced Security – Inbound Rules.
Right click on Inbound Rules and select New Rule …

Select Predefined and choose Windows Remote Management from the drop down menu.

Next, uncheck the predefined rule for the public networks.

Make sure Allow the connection is selected. Click Finish.

Check the settings.
We’re done with the first part. Let’s move on configuring the WinRM service.
Configuring the WinRM Service
Right click on your GPO and select Edit again.
Navigate to
Computer Configuration – Preferences – Control Panel Settings – Services
Right click on Services and choose New – Service. You have to configure Startup, Service name and Service action as below:

Click OK. We’re done here. Next we will configure the WinRM listener.
Configuring the WinRM Listener
Edit your newly created GPO for the last time. Navigate to
Computer Configuration – Policies – Administrative Templates – Windows Components – Windows Remote Management (WinRM) – WinRM Service
Open Allow remote server management through WinRM. Click on Enabled.
Now enter the values for the IPv4 and IPv6 filters. Let’s stop here for a short explanation. If you enter * then all computers in your domain are permitted to establish a connection via WinRM. If you want to restrict access to a single computer then I recommend to provide the IP address of that remote host(s).

Click OK.
Link the GPO to the OU of your Client Computers
In my case all client computers are in the OU Workstations. So I click on the GPO and link it by drag & drop to the OU Workstations.

Next, I run gpupdate on all client computers by right-clicking the OU and running Group Policy Update.


Testing the Settings
You should now be able to connect to your client computers with PowerShell.

There’s also a useful cmdlet to test if everything is working out fine. It’s called Test-WSMan and it should show you something like this:
Test-WSMan -ComputerName client01

You should now also be able to use my Active Directory Domain Services Tool to perform some awesome actions, for example gathering information about the logged on users.
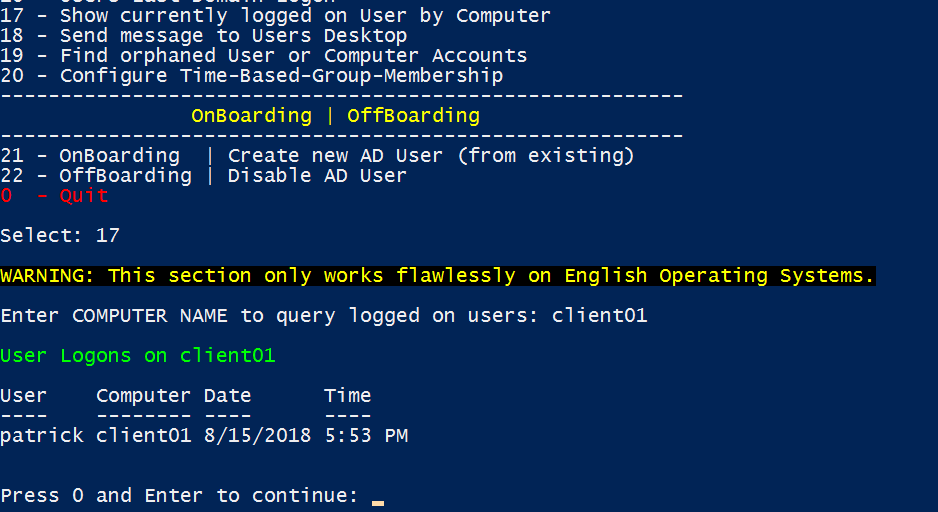
Download the tool here: Active Directory Domain Services Section (Version 1.1)
Categories: PowerShell, Windows 10, Windows Server


14 replies »