
This guide describes the basic configuration of Windows Server Core running Windows Server 2012 and Windows Server 2016.
The following configuration steps will work not only on Server Core, but also on a Windows Server with graphical interface. If you want to keep it simple, you can use sconfig to configure your Server Core: Windows Server 2016: sconfig. In this article we will configure Core with PowerShell.
Remember the advantages of a server running without a gui:

First, install Server Core and login with administrative privileges. Now we move on with the very first basic settings.
Configuring Network Settings
The entire configuration is performed in PowerShell, so PowerShell must be started after login. (Core ist started with cmd by default)

Afterwards, we have to find out the ID of the network adapter.
Get-NetAdapter
Now the IPv4 address and the default gateway can be configured with New-NetIPAddress.
New-NetIPAddress -IPAdress 192.168.112.254 -PrefixLength 24 -DefaultGateway 192.168.112.1 -InterfaceIndex 12 -AddressFamily IPv4

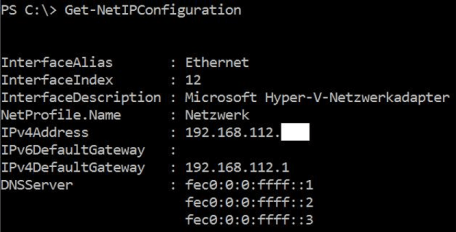
Check the settings with Get-NetIPConfiguration.
Get-NetIPConfiguration
Next configure the DNS-Server with Set-DnsClientServerAddress.
Set-DnsClientServerAddress -InterfaceIndex 12 -ServerAddresses 10.10.10.5,10.10.10.10

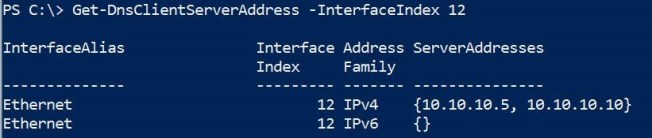
To check the settings run
Get-DnsClientServerAddress -InterfaceIndex 12
Finally, test the IP Configuration with Test-Connection.

Computername
Use Rename-Computer to change the computername.
Rename-Computer server02
Next restart the computer by using Restart-Computer.
Restart-Computer
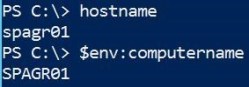
After restarting, start PowerShell again and quickly check the hostname with
$env:computername
Windows Server Activation
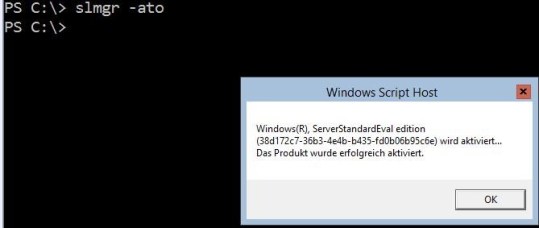
Run slmgr to activate your Windows Server. If you are using the Evaluation Version of Windows there is no need for activating.
slmgr -ato
Windows Updates
Automatic updates can be configured with cscript. Navigate to windows\system32 and run cscript to configure the automatic download and installation of Windows Updates.
Configure
cscript scregedit.wsf /AU 4
Check
cscript scregedit.wsf /AU /v

Printer
To install printers, the role Print-Services must be installed.
Install-WindowsFeature Print-Services
Then run printui.exe / il and select the printer.
printui.exe /il
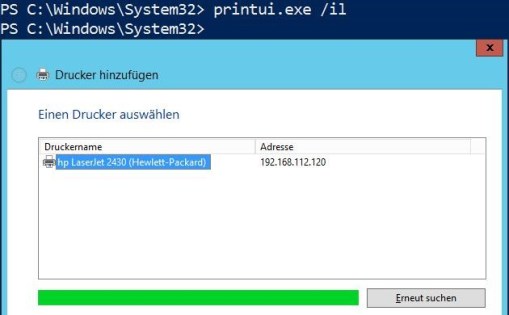
Now just open Notepad, create a new file and try to print.
Get-Content C:\test.txt | Out-Printer
Drivers
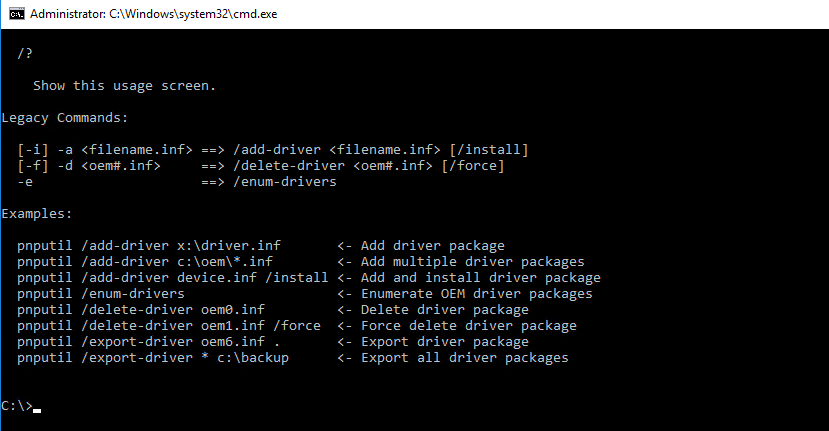
For installing drivers use pnputil.
Some examples:
What’s next?
Server Core supports the promotion to a Domain Controller as described in my article: PowerShell: How to install a Domain Controller with Server Core
For configuring Roaming Profiles with PowerShell go for my article Active Directory: Configuring Roaming Profiles using GUI or PowerShell.
Hope you like it!
Categories: PowerShell, Windows Server


Appreciation to my father who told me about this webpage, this blog is truly amazing.
LikeLike
Glad to hear that. Hope you continue reading my blog posts! Regards, P
LikeLike